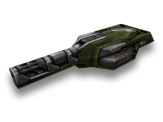
How to Use Thunder (Tips and Tricks)
See Also: Tips and Guides, Thunder

 Pros
Pros
- Well-balanced between high projectile damage and a decent rate of fire.
- Splash damage allows players to damage enemies that did not receive a direct shot but are within the radius of destruction.
- High impact force allows skilled players to knock off others' aims.
 Cons
Cons
- Projectile damage decreases over increased distance.
- Self-damage might be inflicted when the projectile impacts too close to the player.
- Players might deliberately inflict self-damage on themselves to prevent enemies from destroying them, which could cause resentment from enemies.
Hull Combinations for Thunder
Thunder is best used with "Hit and Run" tactics, which require a great amount of mobility. However, multiple thunder shots are usually needed to destroy an enemy, requiring frequent, visible contact with enemies. This increases the time of exposure and the chances of receiving damage from enemies. Thus, when playing with Thunder, it is considered the best to equip a medium hull as it provides a great deal of armor and mobility. Viking is one of the most versatile and widely used combinations for Thunder, while Dictator offsets the base of the turret, allowing the player to peek out of walls and expose only a tiny portion of their hull. Its height advantage also allows players to shoot on top of other tanks, making projectiles pass above obstructing allied tanks.
Lighter hulls provide significant boosts in mobility and enjoyment, and Hornet is a popular choice due to its relative stability and availability. Heavier hulls such as Titan and Mammoth lack the mobility aspect but are ideal for defending specific positions crucial in team matches, due to their abundant armor and high damage dealt per unit of time.
Gamemodes for Thunder
- DM: In deathmatches, survival is key. Pick a heavy or medium hull to guarantee a sufficient amount of armor to prevent yourself from dying too quick to enemy fire. If using a light or medium hull, always be alert to the surroundings, and immediately leave for another position if an enemy is spotted to be approaching your current position. Try to figure out the approximate armor remaining for each target and prioritize the weakest of all. If other enemies are attacking your target, wait patiently until it is certain that your shot can eliminate the target, then shoot to take the kill.
- TDM: Do not focus exclusively on eliminating a single enemy at a time as it will be the job for other teammates with single-hitting turrets. Instead, try to deal as much damage in total to as many enemies at the same time. Depending on the size of the map and your preferred style of play, any type of hull may be used; Heavier hulls would be more suitable for campers, and for aggressive players attacking into enemy positions, a medium or lighter hull would be a better choice.
- CTF: In Capture the Flag, Thunder is usually used as a weapon of support and defense rather than an offensive one. Try to assist your teammates in destroying enemy defenders clustered together or shoot on (but not eliminate) enemies advancing on your base. You may switch to a more offensive style and advance on the enemy base once all enemy defenders have been cleared or neutralized.
- CP: It is strongly recommended to use a heavy hull for this game mode, as the objective is to secure long-lasting control over a specific area. Set up a camping position with direct visibility on the point of objective and defend the pathways with mines. Attempt to eliminate as many enemies approaching the point as possible. You may capture the point in case of urgent need, when all enemies are eliminated, or when your team has an overwhelming advantage on the battlefield.
General Tips for Thunder
- If an enemy is creeping up on you, back down in a straight line and place down a Mine. This will force the enemy to reroute or be severely damaged by the mine. If shooting at them directly will cause self-damage, try to shoot further away from yourself so that only the enemy will be damaged.
- If a group of enemies is clustered together, try to aim at the tank in the center. Splash damage will damage every tank around it, dealing massive amounts of damage.
- If an enemy is hiding and out of direct sight, you may attempt to shoot at a nearby wall. You can also rock your tank slightly to shoot downwards on the floor. The projectile will cause splash damage to the enemy. Just beware that the enemy might take advantage of the time when you are reloading to land direct shots on you, potentially causing more damage to you than you did to them.
- If an enemy with full armor chases you down using a melee or short-range weapon, there’s almost no chance that you can survive the conflict without an ally helping out. Try to locate other weaker targets and eliminate as many of them as possible before you get destroyed.
- You may equip a protective paint with high Protection
 against Thunder, so that self-damage becomes almost negligible.
 - If you’re fighting another Thunder with similar armor strength, try to move away when you’re shooting and move closer when the enemy is shooting at you. This will cause the enemy to deal more self-damage to themselves, which will help you win the duel. If you have little armor remaining, try to shoot right before the enemy Thunder finishes reloading. You will self-destruct, but the Thunder will also shoot at your remains, dealing self-damage to themselves and getting destroyed in the process.