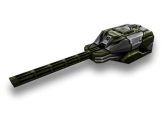
How to Use Railgun (Tips and Tricks)
Jump to navigation
Jump to search

See Also: Tips and Guides, Railgun

 Pros
Pros
- It has a high damage per shot
- Railgun has no range limitations
- High impact force allows players to knock off others' aims, and even flip them over (mostly light hulls)
 Cons
Cons
- The "light" at the end of the barrel lets everyone know that the railgun will fire a shot, making it predictable.
- Low rate of fire makes the Railgun ineffective in close combat.
- Nearly all ranks have access to a wide variety of paints with Railgun protection.
Hull Combinations for Railgun
The Hornet and Railgun combination is one of the most popular combinations in the game, and it has become so for a reason. Light hulls are a perfect match for the Railgun, providing it with the necessary speed to take cover during reloads and quickly change position. However, the recoil, combined with simultaneous enemy hits, can potentially overturn an inexperienced player. Seeing a Railgun on a medium or, even more so, a heavy hull is a rare sight, and such combinations are primarily suitable for defense and positional engagements.
Gamemodes for Railgun
- DM: Ride along the perimeter of the map, utilizing cover, and only expose yourself to take a shot. Don't try to attack obviously intact enemies; keep an eye on wounded ones. Ideally, each of your shots should be lethal. After a few shots, it's sometimes worth changing your "exposed" position.
- TDM: Continuously seek refuge behind fences, buildings —anything— and shoot at enemies within your line of sight. It's better not to focus on a single target but try to wound different ones—it's more advantageous for both the team and the score.
- CTF: The advice for TDM is relevant here as well, but also pay special attention to the flag and enemies directly threatening it. Perhaps your accurate shot will save the team from losing the flag. If the situation allows, you can advance forward and engage opponents at their base and spawn. Carrying flags with the Railgun is not the wisest idea (excluding organized battles).
- CP: Rushing into the heart of the battle and directly capturing a point with the Railgun usually isn't recommended. It's best to stay slightly apart, not drawing excessive attention, and deal damage to the most dangerous opponents. On the other hand, sometimes it's more advantageous to quickly eliminate light enemy tanks to reduce the enemy's numerical advantage on the point (the speed of its capture depends on this).
General Tips for Railgun
- Actively employ the technique known as "peeking," which involves pressing the spacebar or left mouse button before fully emerging from cover to take a shot. This way, you'll "mask" the Railgun's delay from your opponent, and they most likely won't have time to react.
- If the enemy is clearly attempting to disrupt your aim and there's no opportunity to take cover, press your tank's front or rear against a flat wall. Your hull will have no room to sway, ensuring your crucial shot won't miss.
- Avoid close combat and keep an eye on your rear to prevent being outflanked. If this occurs, continue shooting at the targets you've already chosen—odds are, you won't be able to defend yourself effectively
- Don't overlook moments when multiple enemy tanks are aligned, allowing you to penetrate all of them simultaneously.
- Aim for the corners of enemy hulls to force your opponent to spend extra time adjusting their trajectory.